D5-Pro Remote Control
- Control Range: 100km (Subject to environmental conditions)
- Transmit Power: 10W
- Transmission Frequency: <1G (customizable)
- Display: 1.7-Inch LCD
Item List
Remote Control x1
Receiver x1
Accessories
Name
Illustration
Quantity
Packaging box

1
Signal cable

1
Product Description
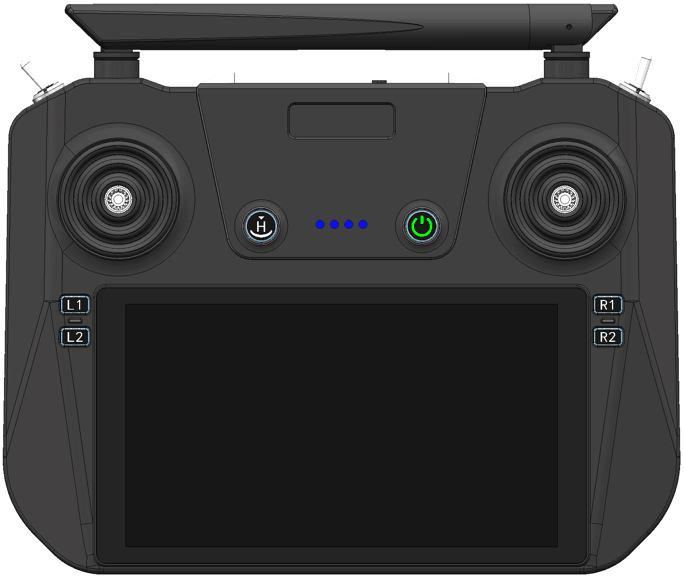
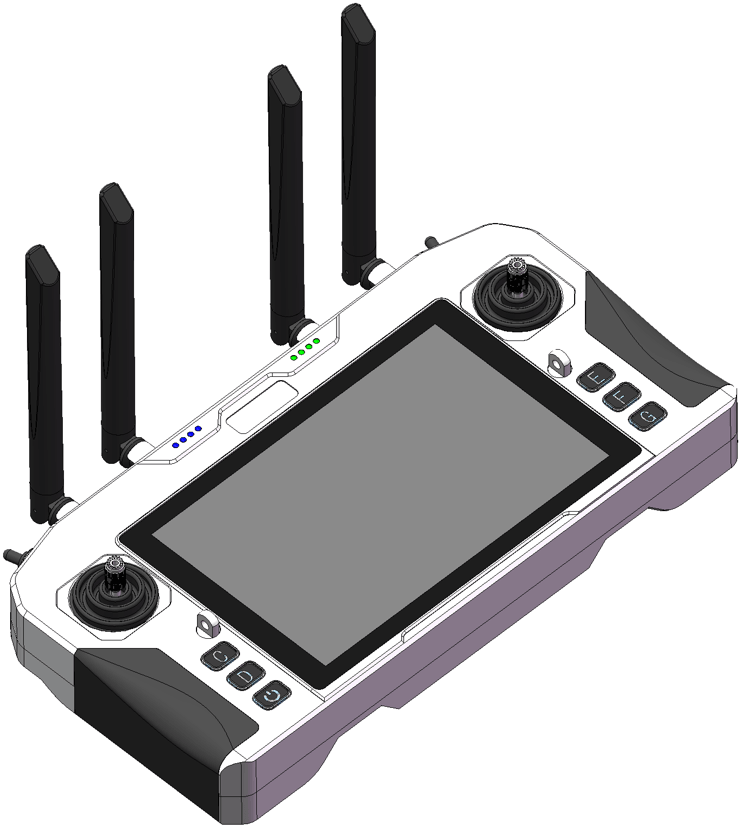
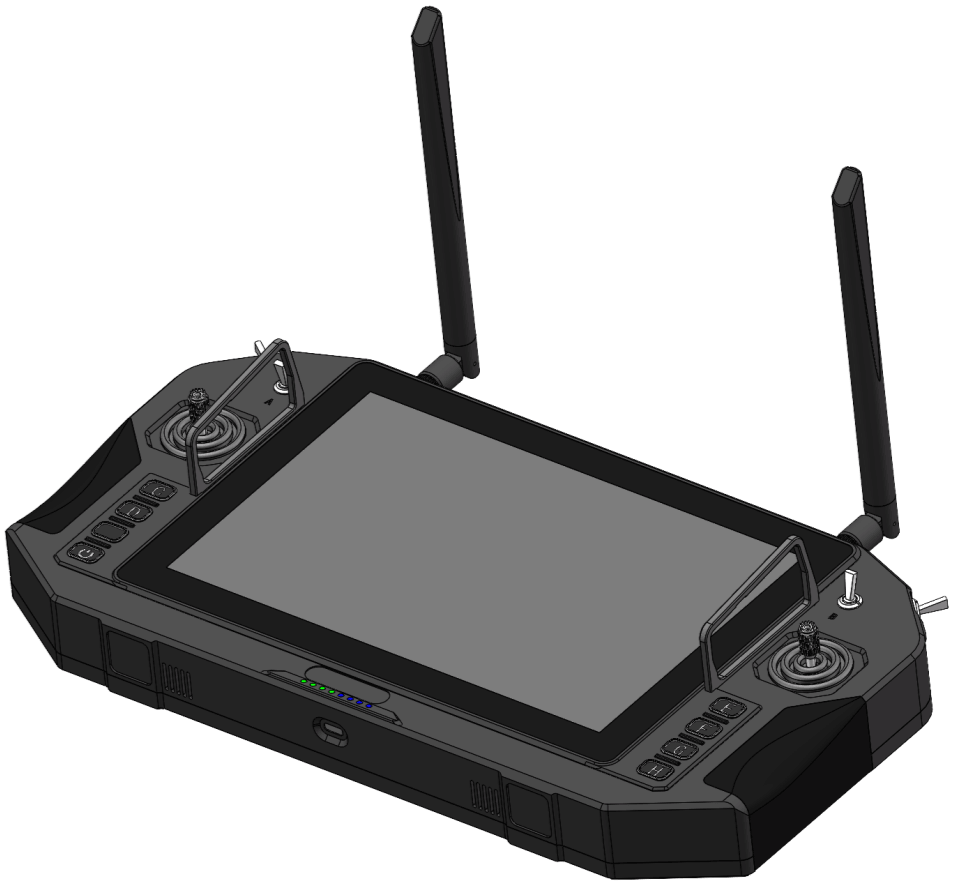
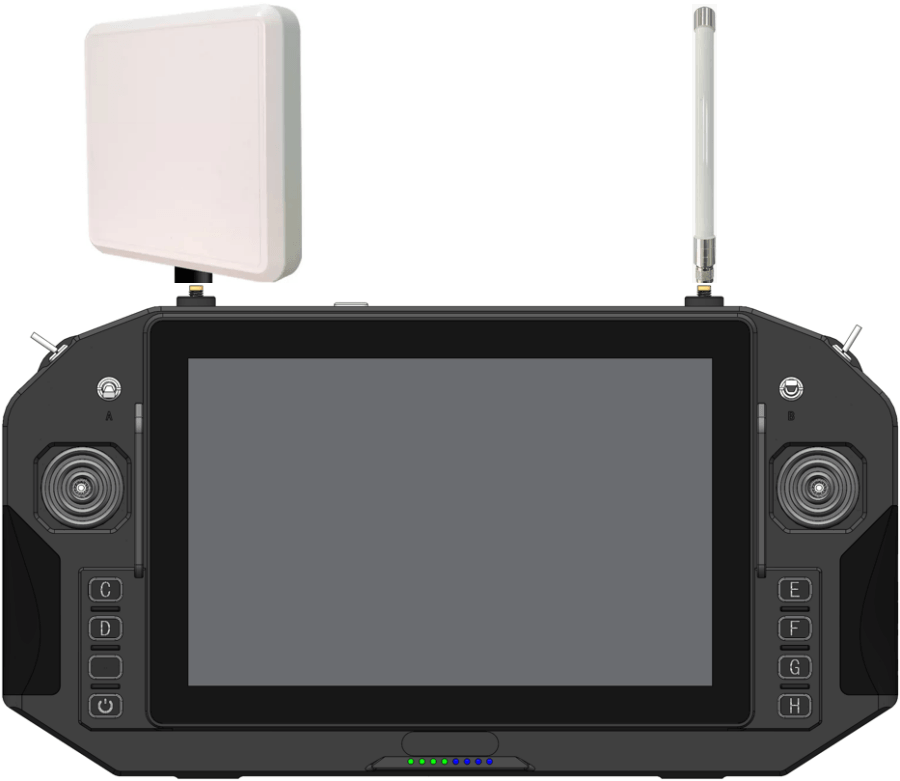
Remote Control
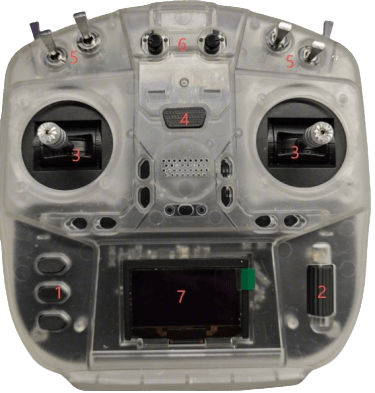
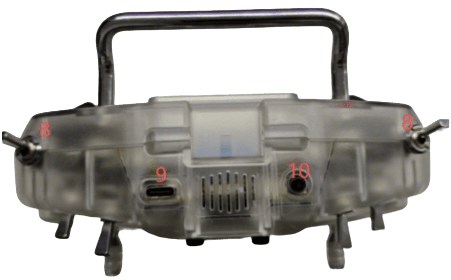
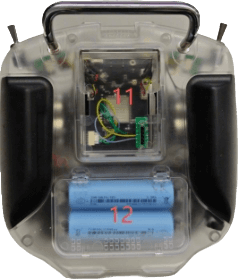
| No. | Part | No. | Part |
|---|---|---|---|
| 1 | Undetermined | 7 | Display screen |
| 2 | Scroll wheel and confirmation button | 8 | Two-position switch |
| 3 | Joystick | 9 | Type-C port (Charging and Calibration) |
| 4 | Power switch | 10 | RF antenna head |
| 5 | Three-position switch | 11 | High-frequency head interface |
| 6 | Rotary switch | 12 | Battery compartment |
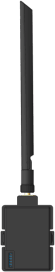
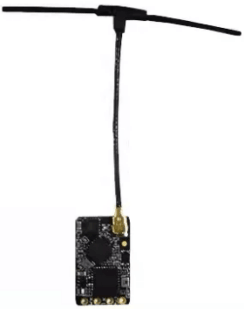
Receiver
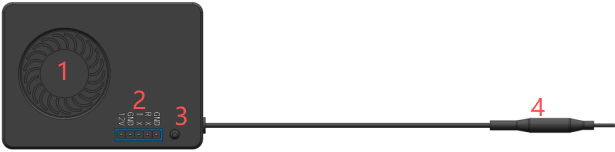
- 1.Cooling fan
- 2.Power and data interface
- 3.Frequency-matching button
- 4.Antenna
Power Supply and Data Interface
| PIN1 | PIN2 | PIN3 | PIN4 | PIN5 |
|---|---|---|---|---|
| 12V power supply | GND | TX | RX | GND |
D5-Pro Remote Control Specifications
| Model | D5-Pro |
| Dimensions | 146 × 148 × 65mm |
| Weight | 470g |
| Control Range | 100km (Subject to environmental conditions) |
| Transmission Frequency | <1G (customizable) |
| Operating Voltage | 6–8.4V |
| Transmit Power | 10W |
| Display | 1.7-Inch LCD |
| Antenna Gain | 2dBi–8dBi (optional) |
| Joystick | Hall Edition |
| External Module | JR Module Bay |
| Battery | 18650 × 2 |
| Upgrade Method | Supported USB online upgrade protocol |
Instruction Manual
Note: The remote control must first be connected to the high-frequency head and supplied with 12V power.
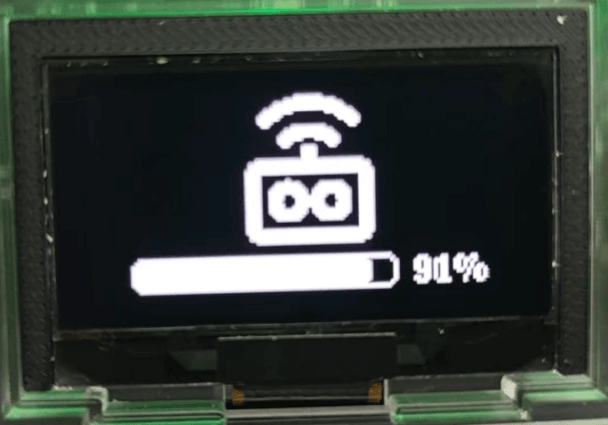
Power On
Press and hold the power button to turn on the remote control.
Power Off
Press and hold the power button to turn off the remote control.
Parameter Settings
Main Page Introduction

- 1. Joystick travel distance
- 2. Power-on time
- 3. Voltage
- 4. Remote control firmware
- 5. Joystick gestures
Settings Menu
Pressing the scroll wheel down will initiate menu settings.
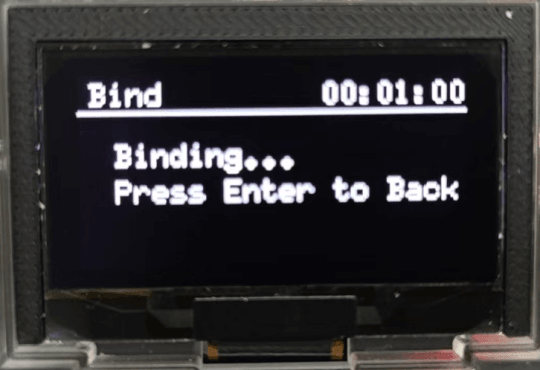
Frequency Matching
After clicking “Frequency Matching”, the interface shown below will appear. Once the receiver’s indicator light displays “Pairing Complete”, click the scroll wheel to confirm, and frequency matching is finished.
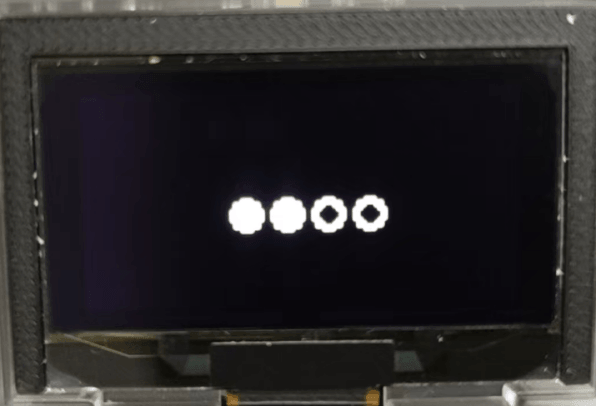
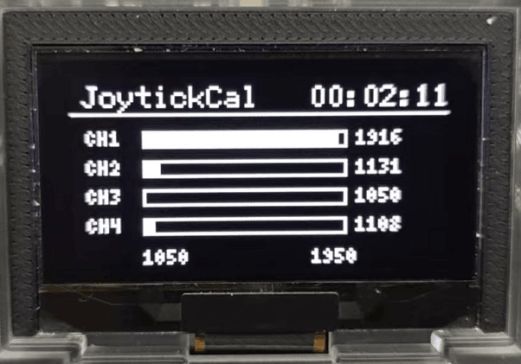
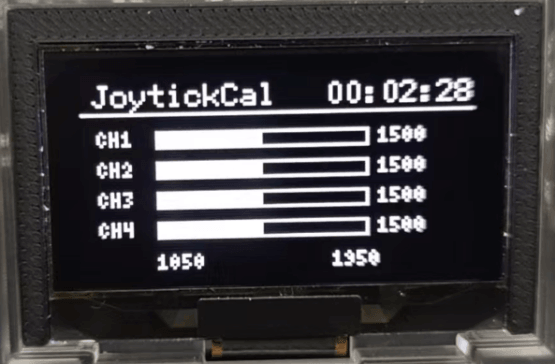
Joystick Calibration
After clicking “Joystick Calibration”, move the joystick to its maximum and minimum positions, then return it to the center position. Click the scroll wheel to confirm, and calibration is complete.
Upgrade
Insert the Type-C cable into the upgrade port, then click “Upgrade”. The remote control will automatically power off and enter upgrade mode.
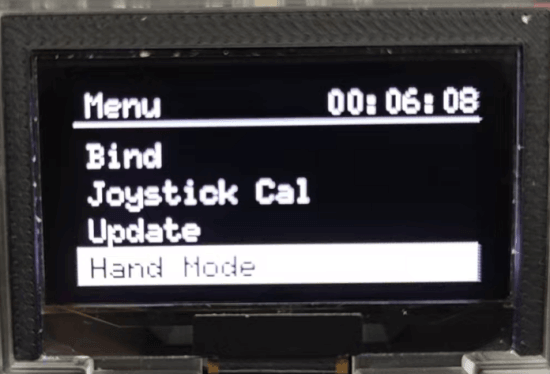
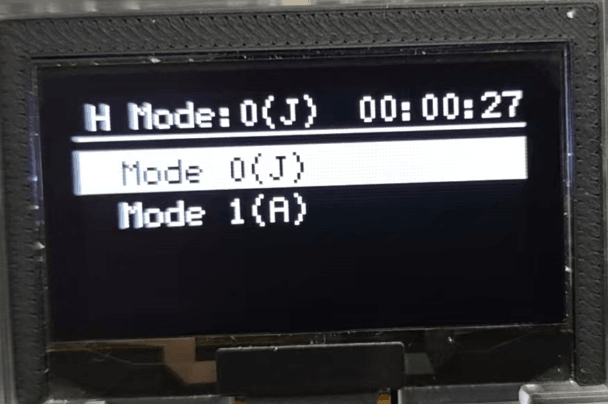
Gesture Settings
Use the scroll wheel to select American hand or Japanese hand.
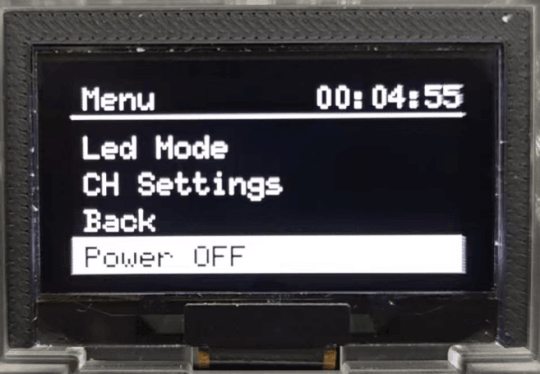
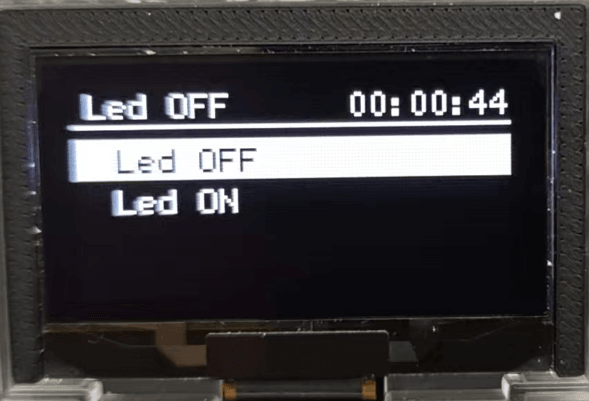
Led Settings
Use the scroll wheel to toggle the light strip on or off.
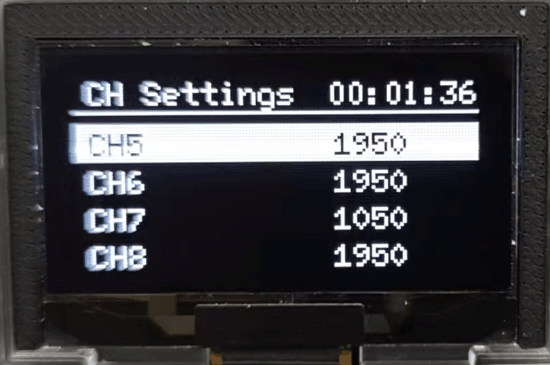
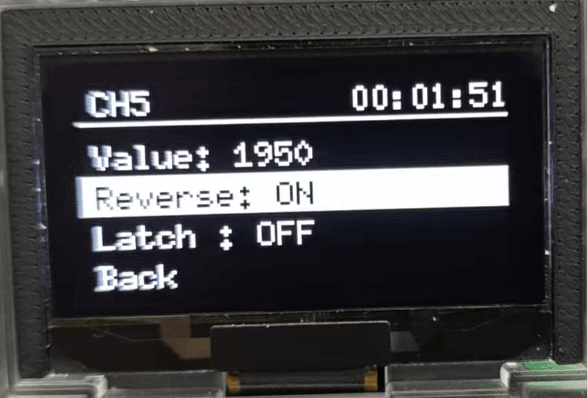
Channel Settings
After entering the channel settings, select any channel to configure forward/reverse direction and self-locking.
Note: The self-locking switch is only suitable for two-stage buttons.
Back
After clicking “Back”, you will return to the main interface.
Power Off
After clicking “Power Off”, you will return to the main interface.
Disclaimer
Thank you for purchasing this product (hereinafter referred to as the “Remote Control”). Please use the Remote Control in compliance with local radio regulations. Before use, carefully read this disclaimer. Use of the product constitutes acknowledgment and acceptance of all terms herein. Strictly adhere to these instructions for installation and operation. We assume no legal liability for any consequences or losses resulting from improper use, installation, or modification by the user.
Product Precautions
- The remote controller functions as the ground station (hereinafter referred to as the “ground station”) and must be used in conjunction with the airborne unit (hereinafter referred to as the “airborne unit”).
- The ground station contains two built-in 18650 batteries. The airborne unit requires an external DC 5V power supply. Ensure the receiver is powered strictly according to specifications.
- Improper operation during use may cause injury or damage to persons or property. Exercise extreme caution and prioritize safety at all times.
- Contact us immediately if you encounter any unresolved issues during product use.
Installation Notes
- Always use standard accessories.
- Ensure the antenna is installed before powering on to prevent circuit damage.
- Keep the receiver antenna free from obstructions. The antenna tip must point vertically downward without bending to avoid reduced communication range or complete loss of signal due to blockages.
- Do not disassemble or modify the device. Contact us immediately if you encounter unsolvable issues during installation.
- Maintain appropriate spacing between electronic devices during installation to minimize electromagnetic interference.
Usage Notes
- Before use, ensure all cables are securely fastened and all components function properly.
- After powering on, first launch the remote control configuration software to verify all channels are operational.
- Inspect the surrounding environment to ensure no other devices cause interference, as this will severely impact the remote control’s data transmission performance.
- Ensure the antenna remains unobstructed and unbent during operation. Keep it away from metal structures to prevent interference with the communication link.
- Check the remote control’s battery level before use. If low, recharge it promptly. If the remote control powers off, the receiver will enter fail-safe mode. Cease flight operations when the battery is critically low.
DroneSafer Remote Controller Series Comparison
Need to compare control range and mission class? Compare UAV remote control ranges and select remote control by mission distance with one quick view.